User guide
Managing a position
The cockpit: health, the plan, review triggers, and the daily decision log.
Once a spread is Open, selecting it shows the cockpit — everything you need to manage a live position in one place.
The position strip
A compact read of where the trade stands: entry → mark, current P/L, target progress (how much of max profit you've captured), distance to your short strike, and DTE (days to expiration). These reflect your real size and fill, not a one-lot notional.
The health verdict
A plain call on the position — Hold, Defend, or Exit — with a 0–100 health score, a short trend, and a confidence level. The color follows severity: green = favored, amber = caution, red = blocked. Below it, the health rail breaks the score into its components and the signals behind it.
The plan
Your standing intent for the trade:
- Thesis — why you put it on and what would change your mind. Edit it any time; a pill shows whether it's still intact, pressured, or broken relative to the position's health.
- Commitments — the structured lines a prose thesis tends to skip: profit target %, max-defend %, an optional time stop ("close N days before expiry/earnings"), a roll trigger, and an invalidation.
Review triggers
Triggers are your alarms — when a condition happens, then what you plan to do. Add or remove them on a position; to change one, delete and re-add it (that keeps your decision record honest). Each trigger shows a firing state:
- Latent — not near.
- Approaching — getting close.
- Active — firing now.
- Unavailable — the inputs aren't in the current snapshot.
When a trigger newly fires, a banner surfaces it and the rail flags the position.
The decision log
Triggers are the alarms; the decision log is your response. Each time you review the position, record what you decided — hold, watch, harvest, defend, or exit — with an optional note. Any triggers firing right now are tagged onto the entry automatically (or you mark it an explicit manual review), so every decision is attributable to why. The history stacks your entries newest-first — a dated, durable trail that's separate from the system's live read.
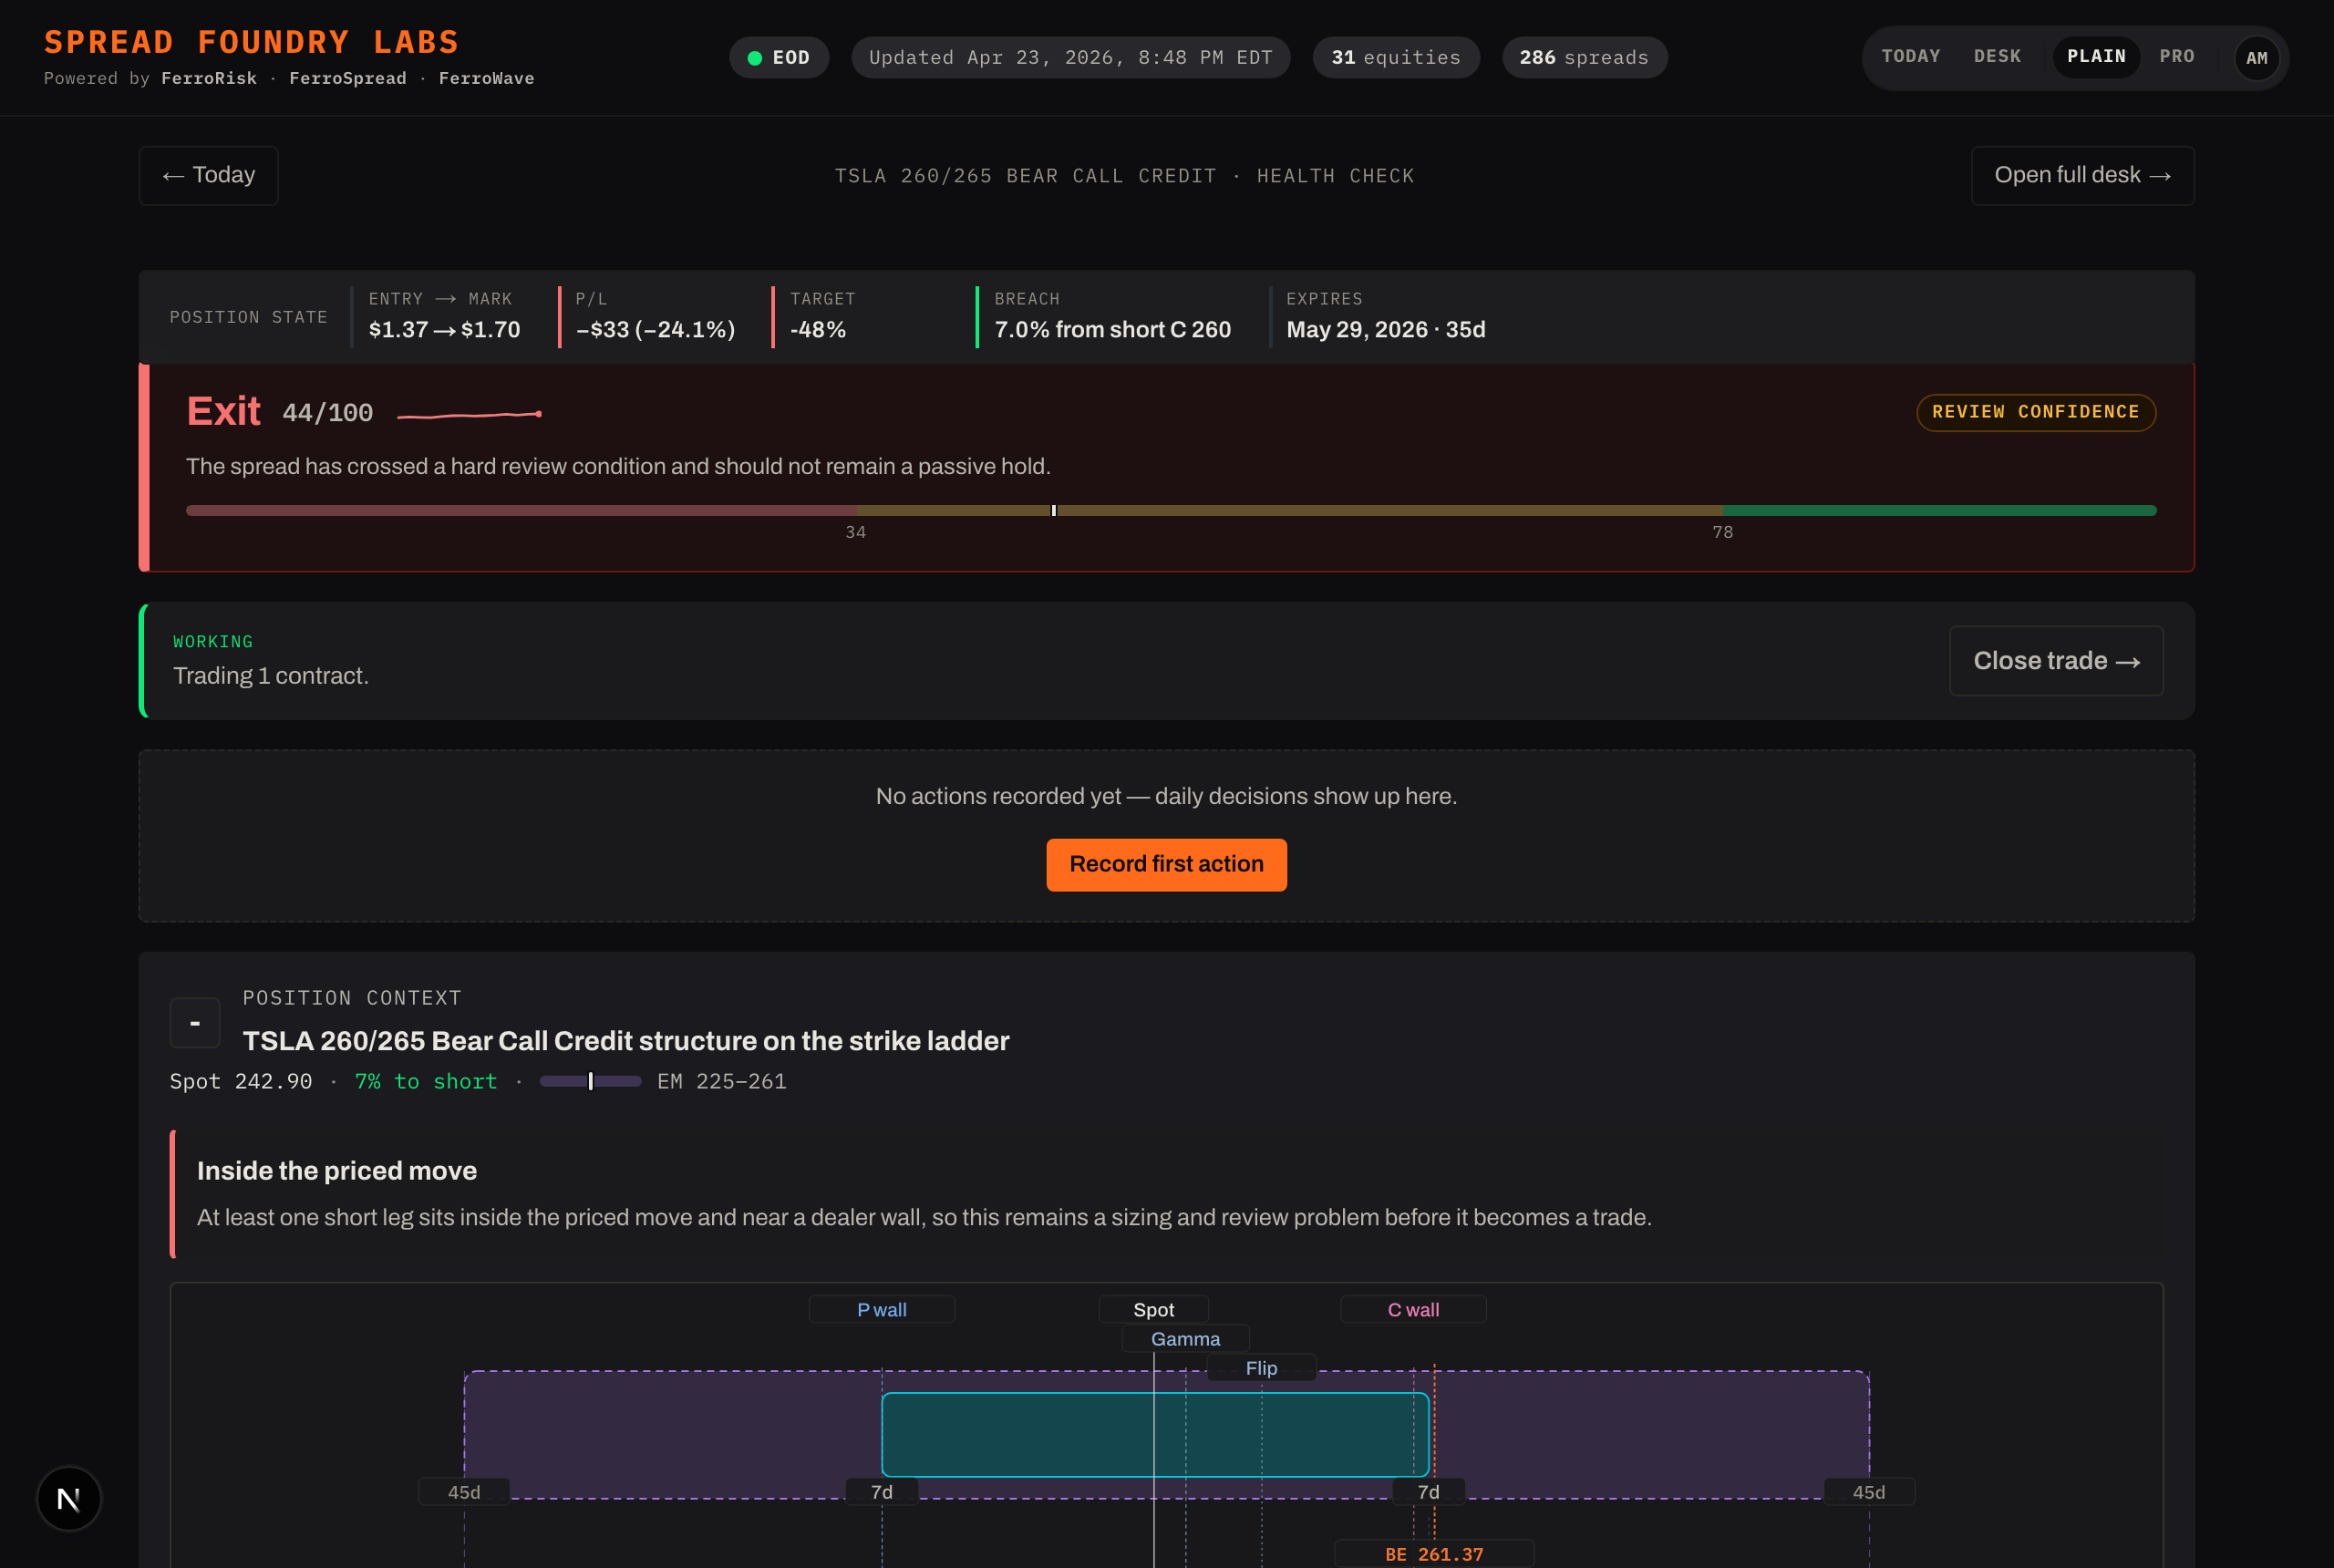
Position context
The structure ladder shows where your legs sit in the priced range, with the payoff curve stacked beneath it on the same price axis — structure and outcome read as one picture. It's collapsed to a one-line max profit / max loss / break-even summary by default.
When it's time to get out, see Closing & history.